
In Our Last Episode …
… there was a homeowner who, after trying to save a few bucks, was stuck with possibly the worst shower installation ever. It was certainly the worst ‘custom’ tile shower install that I’d ever seen. Aside from the uneven tile, bad grout, and completely flat unsloped floor, there was literally no waterproofing at all for the shower base. Not good.
The homeowner had had to have their original second-floor master bath tub and shower ripped out to get at a water leak in the supply piping. Instead of simply replacing the garden tub and small shower surround, they chose to instead make the entire original tub/shower footprint into one huge walk-in shower with a sort-of auxiliary foot washing station where the tub spout used to be.
So, the new shower area had two legacy drains and a 3ftx8ft footprint that needed to be very creatively sloped to manage the dual-use showering and washing areas.
An unconventional choice, but totally doable for a competent installer capable of making a truly custom-sloped shower floor. Unfortunately for the homeowner, the first installer wasn’t competent.

SO, my job was to fix both the slope problem and the total lack of waterproofing without completely ripping out all of the previous tile install work. Challenge accepted!
STEP ZERO: demo to the subfloor
Pretty simple step. Making the previously installed shower floor tile and concrete backerboard substrate ‘base’ go away didn’t require anything more than a wide-bladed chisel and a small sledgehammer. It was, however, a real pisser to landfill all of this:

Ripping out and trashing otherwise perfectly good tile and other materials is generally the worst part of any redo job.
STEP ONE: why two drains in the first place?
Aside from the fact that there were already two legacy drains available (one for the previous small stand-up shower and another for the previous garden tub), a double-drain setup actually made a lot of sense for this very creative new huge shower situation.
Most of the future new shower area use is going to be simply that — daily showering. The former tub area converted to a wash station isn’t going to be used nearly so often. So, it’d be at best a cleaning maintenance pain to try sloping both areas to the same single drain. Why double the wet floor area when you could instead make use of two drains to help get rid of water as quickly as possible every time the shower is used?
That was the homeowner’s thinking. Unique and definitely custom. Not an easy custom slope challenge though.
STEP TWO: fix the drains!
So, re-using both legacy drains was definitely a good choice. But, leaving both drains in their original positions was not.
Tub drainpipe stubouts are situated very close (3in or so) to walls because that’s where tub drains are. But this drain location is generally way too close to a wall for any kind of reasonable shower (or foot/dogwashing station) drain placement. Think about it — with only 3in of space to one wall and nearly 3ft of space to the opposite wall/curb, you’ll need a really extreme slope on one side of the drain to match any kind of effective water-shedding slope running to the opposite wall/curb.
So, it’s best to relocate a legacy tub drain further from the wall when making a former bathtub space into a shower. If the bathroom is on a concrete slab, then this is very difficult to do because it requires jackhammering through thick concrete.
But if the bathroom is on a second floor, then relocating drains is easy-peasy:

Cutting into plywood subfloors is both simple to do and pretty simple to repair with added framing and new plywood. And this was a necessary step anyway since the homeowner decided to go with Kerdi waterproofing for the shower base. This required replacing the previously installed conventional shower drains with specially engineered drains that can be bonded to waterproof Kerdi fabric.
The upside? An opportunity to place the new drains in the absolute ideal locations:

STEP THREE: make super-easy minigolf!
Always remember that water is most always dumb and lazy. Sometimes it disobeys gravity in weird ways through capillary action, but generally water always enlists gravity’s help for the quickest and easiest exit from any contained space.
So, water really wants to find the center of the earth as easily as possible. A good tile installer will therefore slope shower floors to help water fulfill this goal. On this job, that meant constructing the easiest minigolf hole(s) imaginable:
Seriously, the whole shower surface needed to be custom sloped so that a golfball (or water) laid down anywhere on the surface would instantly roll right off into one of the two drain holes. Easy in theory, but takes some skill in practice.
Shower Base Prep: plastic and wire! A proper tile shower base is fashioned from drypack “deck mud” concrete, a very simple portland cement and sand composite with just enough water to make a sandcastle-like mixture. If laid on a slab base, it doesn’t need any additional reinforcement or special lining for drying and curing.
But, if installed on a plywood subfloor, deck mud needs some extra prep to ensure a strong crack-free (and therefore trouble-free) install.
First, it needs a layer of plastic to ensure that the plywood doesn’t wick moisture away from the concrete too quickly. This could make the concrete too brittle to form a strong base. Any plastic will do. Simply lay it down and staple in place:

Next, you’ll want to install some wire mesh. Just about any chickenwire, close-set wire, wide screen wire, etc will do. The goal here is to make certain that the concrete base layer won’t fracture if the subfloor ever flexes or shifts. The wire mesh embedded in the deck mud concrete layer will help it to flex with any subfloor shifting without cracking.
Again pretty simple. Just cut the wire to fit the space and then lay it down:

Deck Mud Install: pack and slope! The final shower base install step is the most labor-intensive. That’s because it’s literally kinda labor-ious to mix up ~500lbs total of concrete mix, haul it all up a few flights of steps one 5gal bucket at a time, and then pound it all into place to create a carefully sloped 1-3in layer of compacted concrete.
The whole process looks like this:


The final result is a concrete layer with a custom-designed slope to help water find it’s way to the earth’s center (or at least to begin that journey) as quickly as possible!

STEP FOUR: the waterproofing!
The whole reason for all this work was to make sure this shower was properly waterproofed for decades of use. In old-school 1970s and -80s shower construction, that would be achieved by putting a 5mil flexible PVC plastic liner underneath the deck mud layer and glued to the underside of the shower drain flange. Nowadays though, there are more effective waterproofing materials available.
For this situation, Kerdi fabric on the shower floor and curb with some RedGard added to the Kerdi wall seams for extra insurance was the best choice. Ideally, you’d want a RedGard waterproofing layer painted all the way up the concrete backerboard walls, but in this case the ideal wasn’t possible. The in-process looked like this:


The Kerdi fabric waterproofing puts a thick continuous waterproofing layer directly below the shower floor tile for a guaranteed mold-free lifetime of bathing goodness. And, Kerdi with RedGard on the concrete backerboard wall joints and curb will ensure that the moisture running down the backside of the shower wall tiles will still go right down the drain instead of into the wall framing.
This is one of the few advantages to repairing a shower originally done by someone who didn’t really know how to set tile on walls — sometimes it reveals accidental advantages. In this case, removing the first course of wall tiles revealed really spotty thinset coverage behind the wall tiles. Fortunately enough to at least keep ’em fairly well stuck on, but with lots of void space for moisture to very very easily drop down to the floor level. So, a lack of waterproofing on the concrete backerboard walls is unlikely to cause a long term problem. The moisture that wicks behind the wall tile will simply fall down to the waterproofed base or quickly evaporate back out through the tile and grout.
STEP FIVE: finally, re-install the tile!
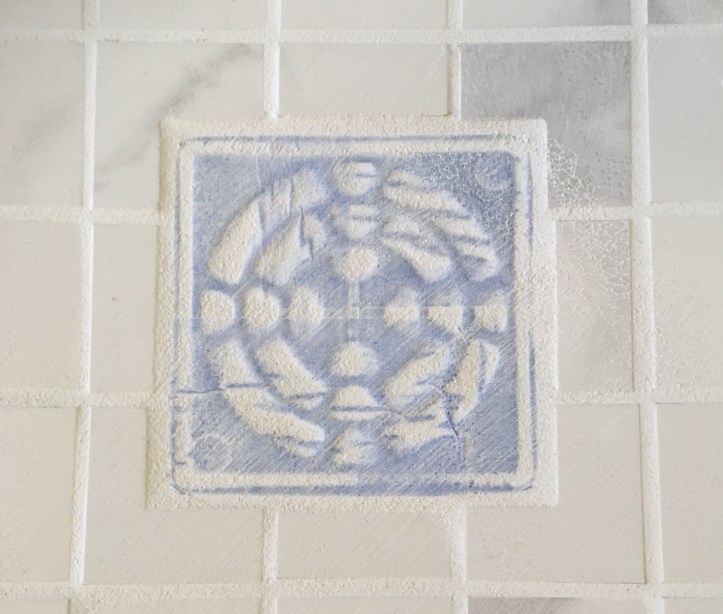
The client decided to go with the same tile for the re-tiling, which was a great design choice. With such a large shower space, anything but bright tile would likely have looked a bit too massive.
Pro tip — always, always, ALWAYS do a test layout/fit for shower floor tile. Remember that you’re basically putting 2-dimensional flat tile sheets onto a (if properly sloped) 3-dimensional surface. If you just start slapping down tile sheets without test fitting first, then you will have wavy ugly grout lines as a result.
The shower floor tile layout process looked like this:

And, re-installing the first course of wall tile (and curb tile) looked like this:

STEP SIX: grout and seal and done!
The floor tile got sanded grout. You should always use sanded grout for shower floor tile. Sanded grout is more dense and strong than unsanded grout, so it will: 1) resist cracking, 2) help to reduce moisture intrusion a bit, and 3) be a lot easier to clean. Also, sanded grout is great for slip prevention.
The grout install process looked like this:


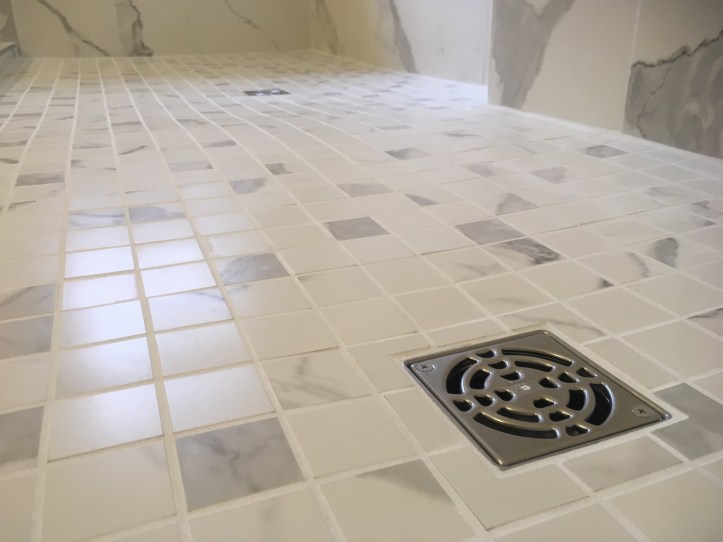
And just an added detail tip: THIS is how you properly mask off a shower drain to ensure the drain screws, etc, don’t get clogged up with grout:
For sealing, I applied nearly a quart of “StoneTech Grout Sealer“, a water-based DuPont product that works really really well. It goes on easily (just spread with a wide foam chip brush), wipes off easily without leaving noticeable residue on even natural stone tile, and doesn’t affect the grout color or shade. Makes sealing the grout on even very large shower floors an easy 30min process.
Remember though that sealing shower floor grout does not make it waterproof. Sealing simply adds a bit of water resistance but more importantly helps prevent oils and soap scum from adhering to the grout. So, it’s still a good final step for making the shower easier for clients to keep clean.
THE RESULTS? Judge for yourself!
And here are some final before/after pics showing the payoff for getting an actual professional tile installer to do jobs requiring professional skill. See if you can spot the “before” versus “after” views!


And, a big finish pic montage:


While the tile work definitely looks a lot better now, the real key difference is in the things below the surface. The client’s shower is now properly waterproofed with a properly sloped floor, which will ensure years and decades of trouble-free use.