
When you just need a classic…
You can’t go wrong with a white subway tile backsplash. This post describes how to replace a kitchen backsplash with maximum results for minimal cost. If you’re looking for a simple backsplash solution as part of either a kitchen repair or complete makeover, then read on for tips!
The Situation
These folks had to replace their kitchen base cabinets and countertops due to an unfortunate plumbing leak. Their kitchen faucet supply piping froze, then burst, then put several hundred gallons of water into the walls. They ended up having to rip out and replace all the base cabinets along with the kitchen countertops too.
This meant that the tile subway backsplash had to be redone as well. Fortunately for them, perversely, the previous backsplash was quite slapdash to begin with. A previous home flipper had used the absolute lowest bidder, with terrible results. Here are some examples of how NOT to properly tile around window ledges, under cabinets, and around outlets and switches:


Crooked, cockeyed, and sloppy is no way to live. The clients had bought the house for the central Austin location and its other features. But they had never liked the backsplash they got with the deal. So completely replacing their backsplash was a win-win. It had to go, and the clients had always hated it anyway!
The Design
Remember that these folks had just spent a lot of money on a completely unplanned emergency kitchen cabinet and countertop replacement project. So, they had a pretty tight leftover home insurance reimbursement budget for the new backsplash.
Fortunately, a simple yet classic subway tile backsplash design with white porcelain ceramic uses the least expensive materials possible. The tile is the biggest material cost for any backsplash. So, using inexpensive tile really helps the projcet budget.
PRO TIP: If you have to go cheap, you can choose cheap materials but NEVER cheap labor. A lowest bidder can ruin an expensive tile install real quick. On the flipside, a pro chef can make any ingredients sing.
A classic subway backsplash look with sneaky cheap tile (what the previous homeflipper had been aiming for) still made total sense for these folks. The cabinets were white, and the new onyx stone countertops they had splurged on were also white with interesting dark-ish grey mineral inclusion veins. The clients wanted the backsplash to complement the countertops and give a midcentury modern feel, with zero maintenance besides the occasional rubdown.

This was all perfect for the timeless tuxedo of kitchen backsplashes, white ceramic subway with grey or grey-ish grout. Goes with anything, fits any decade from 1920 to 2020, and is super easy to keep clean. It’s what the previous houseflipper was trying for.
Again, using cheap finish materials can actually pay off if you don’t also cheap out on the installation skill. The rest of this post describes how you can get the most out of that install labor!
The Material

The tile was bargain basement 3×6-in white ceramic Daltile with simple 2×6-in matching bullnose trim. The key to making the most of any tile is to install it with a thoughtfully balanced pattern and impeccable lines. This is how you can make caviar out of salty fish eggs.
The Plan
Most of my remodel clients are replacing a backplash after a new countertop install. Sometimes they try to remove just the tile. Here’s what that looks like if you try to preserve the backerboard underneath:

Every proper backsplash tile replacement project starts with a careful but full to the studs demo. You can install backsplash tile directly on top of drywall, since kitchen backsplashes don’t have to be watertight like a bathroom tub surround or shower wall. You can also install backsplash tile on concrete backerboard if you’re into overkill. But the backerboard has to be in perfect shape (plumb, level, and securely screwed to studs every 16-in minimum) for a good result.
This is why everything behind the previous tile needs to be ripped out to the studs for a backsplash redo. It’s actually way less work in the long run. And, it gives you the opportinity to uncover and correct any previous shenanigans. For example, you might discover a serious but easily fixable problem like this:

These folks had a water leak becuase their kitchen sink pipes froze and burst. Opening up the wall for the new backsplash install revealed that the origional homebuilder had insulated the exterior kitchen wall in the most haphazard way possible. That was annoying. But demo also showed that a subsequent homeflip contractor had added a bay window opening with absolutely no insulation at all.
This is one benefit of doing a demo to the studs anytime you’re replacing a backsplash. It reveals potential problems, and also gives an easy opportunity to re-do the kitchen wiring to add new outlets or undercabinet lighting. It is VERY easy to rewire a kitchen counter run on an existing circuit with the drywall removed.
These folks were happy with their previous outlet and switches situation, though they were also happy to get rid of some useless legacy wiring like an outdated hardwired phone outlet jack. They were also SUPER stoked about packing the exterior kitchen wall with proper insulation to prevent future winter freeze problems.
Here were the project steps:
- Cut out the previous tile and drywall to the studs from countertop to wall cabinet height
- Repair any problems revealed by the demo
- Button up the backsplash wall with new drywall backerboard
- Install ceramic subway tile straight and true
- Install grout that will wear like stainless steel
- Finish with evenly caulked and easy to clean joints and corners
And here is a detailed description for how each step went!
Demo and Repair
Again, cutting out the legacy drywall revealed that the previous reno flipper had indeed skimped on more than just surface finish details. The bumped-out kitchen sink window ledge had zero insulation to keep out winter freeze drafts, which explained the previous burst pipes plumbing emergency.


Opening up the wall made it easy to fix this issue and also stuff extra insulation into all the other stud bays too.
Button Up
It is not necessary to use concrete backerboard as a substrate for every wall tile install. Unlike a shower or tub surround, a kitchen backsplash will never come close to seeing the level of moisture that makes concrete backerboard a necessity. Regular drywall is a fine substrate for backsplash tile.
It’s also not necessary to tape and seam the drywall substrate for a tile backsplash install. The tile will completely cover all the joints and seams.

Just be sure to securely screw the backerboard to the studs, and make the entire substrate completely flat. Do not leave any wavy spots, since this will needlessly complicate the tile install. If some of the wall studs are out of plumb, then use shims to make sure the replacement drywall is all flush to itself. If any studs are wider than 16-in on center, then add blocking to make the replacement drywall solid.
Install the Tile
Even a “simple” subway tile backsplash needs careful layout planning in order to look balanced and purposeful. This is especially important for a long kitchen counter run. You ideally want to perfectly center the pattern on both the sink and stove. You also want to balance the subway pattern around windowsills and wall cabinets. This is how you can avoid little skinny tile bits in the inside corners and other sloppy layout imperfections. However, you almost always have to make a few trade-off decisions when putting arbitrarily-sized tiles in an already built space.

In this case, the kitchen cabinet and countertop installer had not exactly lined up the sink and faucet to the window opening. This made it impossible to center the pattern on both the sink and the window, so we chose the sink as the centerpoint. Since the window opening was pretty wide (and also not centered to the wall cabinets), it made sense to use the faucet as the main focal point.
You can install wall tile with a wide variety of thinsets or mastics. Thinset is basically fine concrete, and you can use different formulations for various special tile types like glass, natural stone, etc. Mastic is basically organic glue, and can be used for just about any tile type in non-wet applications like a backsplash.

The least expensive adhesive you can use is unmodified thinset. I personally prefer the Mapei brand because it has a fine texture and comes in plastic bags (more convenient than the paper bags that unmodified CustomBlend thinset comes packaged in). You can install a kitchen backsplash on drywall with just about any adhesive. So, don’t spend needless money on fancy thinset unless it’s required for fancy glass or marble mosaic tile.
Once the start points were set, installing the subway tile backsplash was “simply” a matter of maintaining perfectly even gaps between the individual tiles and making sure that each tile was perfectly flush to all the tiles around it. There were also a lot of very precise cuts that needed to be made around the cabinet and window trim, and also of course around all the electrical boxes. It’s important to make these electrical box cuts very precise, since outlets and switches won’t sit securely unless their metal tabs are completely supported by the tile.


It can also be tricky to get perfectly consistent grout line widths between each tile when working with inexpensive ceramic tiles. Each individual tile will have some variation in the amount of ceramic overglazing around the edges. Therefore you need to be careful with the overall level and sometimes use bits of cardboard instead of plastic spacers to jigger particularly problematic tiles into place.
Oh, and you have to do all of this while working quite quickly since unmodified thinset in particular will begin to “skim over” pretty much immediately after being spread on drywall in a thin coat. The drywall will immediately start sucking moisture out of the thinset mix from behind, while the open air will cause a dry film to develop on top. Both of these things will prevent a good bond with the tile and can result in tiles literally popping off the wall once the thinset fully cures.
All of this is why installing even a “simple” ceramic backsplash takes skill and practice. Putting tile on a wall isn’t rocket science. But it is a craft. If you want a perfect result, then you need a pro.
Install the Grout
There are lots of options when it comes to grout. Sometimes the tile determines the grout (for example, traditional sanded grout can’t be used with glass tile since it’ll scratch and dull the tile surface while installing). Sometimes the pattern determines the grout (for example, unsanded grout has to be used for grout widths 1/16-in or smaller).
This project used basic Daltile ceramic tile with 1/8-in grout lines, so any grout type could have worked. However, going with the least expensive unsanded grout would have been a mistake in this instance. The clients were really into cooking and often hosted big dinner parties featuring homeade chili, pasta, and other sauce dishes. Therefore, they needed a grout that would resist staining and be super easy to clean.

So that’s why we used my favorite all-purpose grout, Mapei’s “Ultracolor Plus FA” formulation. It’s a highly modified cement-based grout that uses extra-fine silica to match the density of traditional sanded grout without the abrasive install issues. It can also pack into tight 1/16-in grout joints or span superwide 3/4-in gaps. It doesn’t shrink or crack as it dries and cures. Mapei “Ultracolor Plus FA” grout is very dense, and it is pre-sealed. This grout will resist staining for a lifetime. It’s also easy to work with and fully cures within 24hrs.
Finish with Caulk
You cannot pack grout into inside tile seams along countertops. Same goes for tub surrounds and the 90 degree inside tile seams in showers. Grout is fantastic for staying in place between tiles on a flat surface. It will, however, eventually crack and crumble out of inside joints.
So you need to finish these installations by installing caulk in the seams. Caulk is flexible enough to expand and contract a bit even when fully cured, and so will fill seams without cracking or chipping out.

However it’s important to use the correct caulk . DO NOT go to the big box paint section and get plain ‘ol painters caulk or basic silicone caulk! Instead, go to the tile aisle and get proper color-matched grout caulk. Both Mapei and PolyBlend (the two big grout manufacturers) have a full line of specialized caulks that match every grout color that they offer.


It’s also important to install the caulk with precision. DO NOT just squeeze a bead into the seams, lick your finger, and hope for the best. This will result in an uneven mess that’ll make an otherwise fantastic tile job look like junk. Instead, take the time to carefully mask off your caulk joint lines with tape.
The prep will be an annoying pain, but the actual caulking will then be a breeze. With everything masked off, you can simply smooth all the seams to precise thickness without worrying about the mess. Peeling off the masking tape will then give you perfect finish lines.
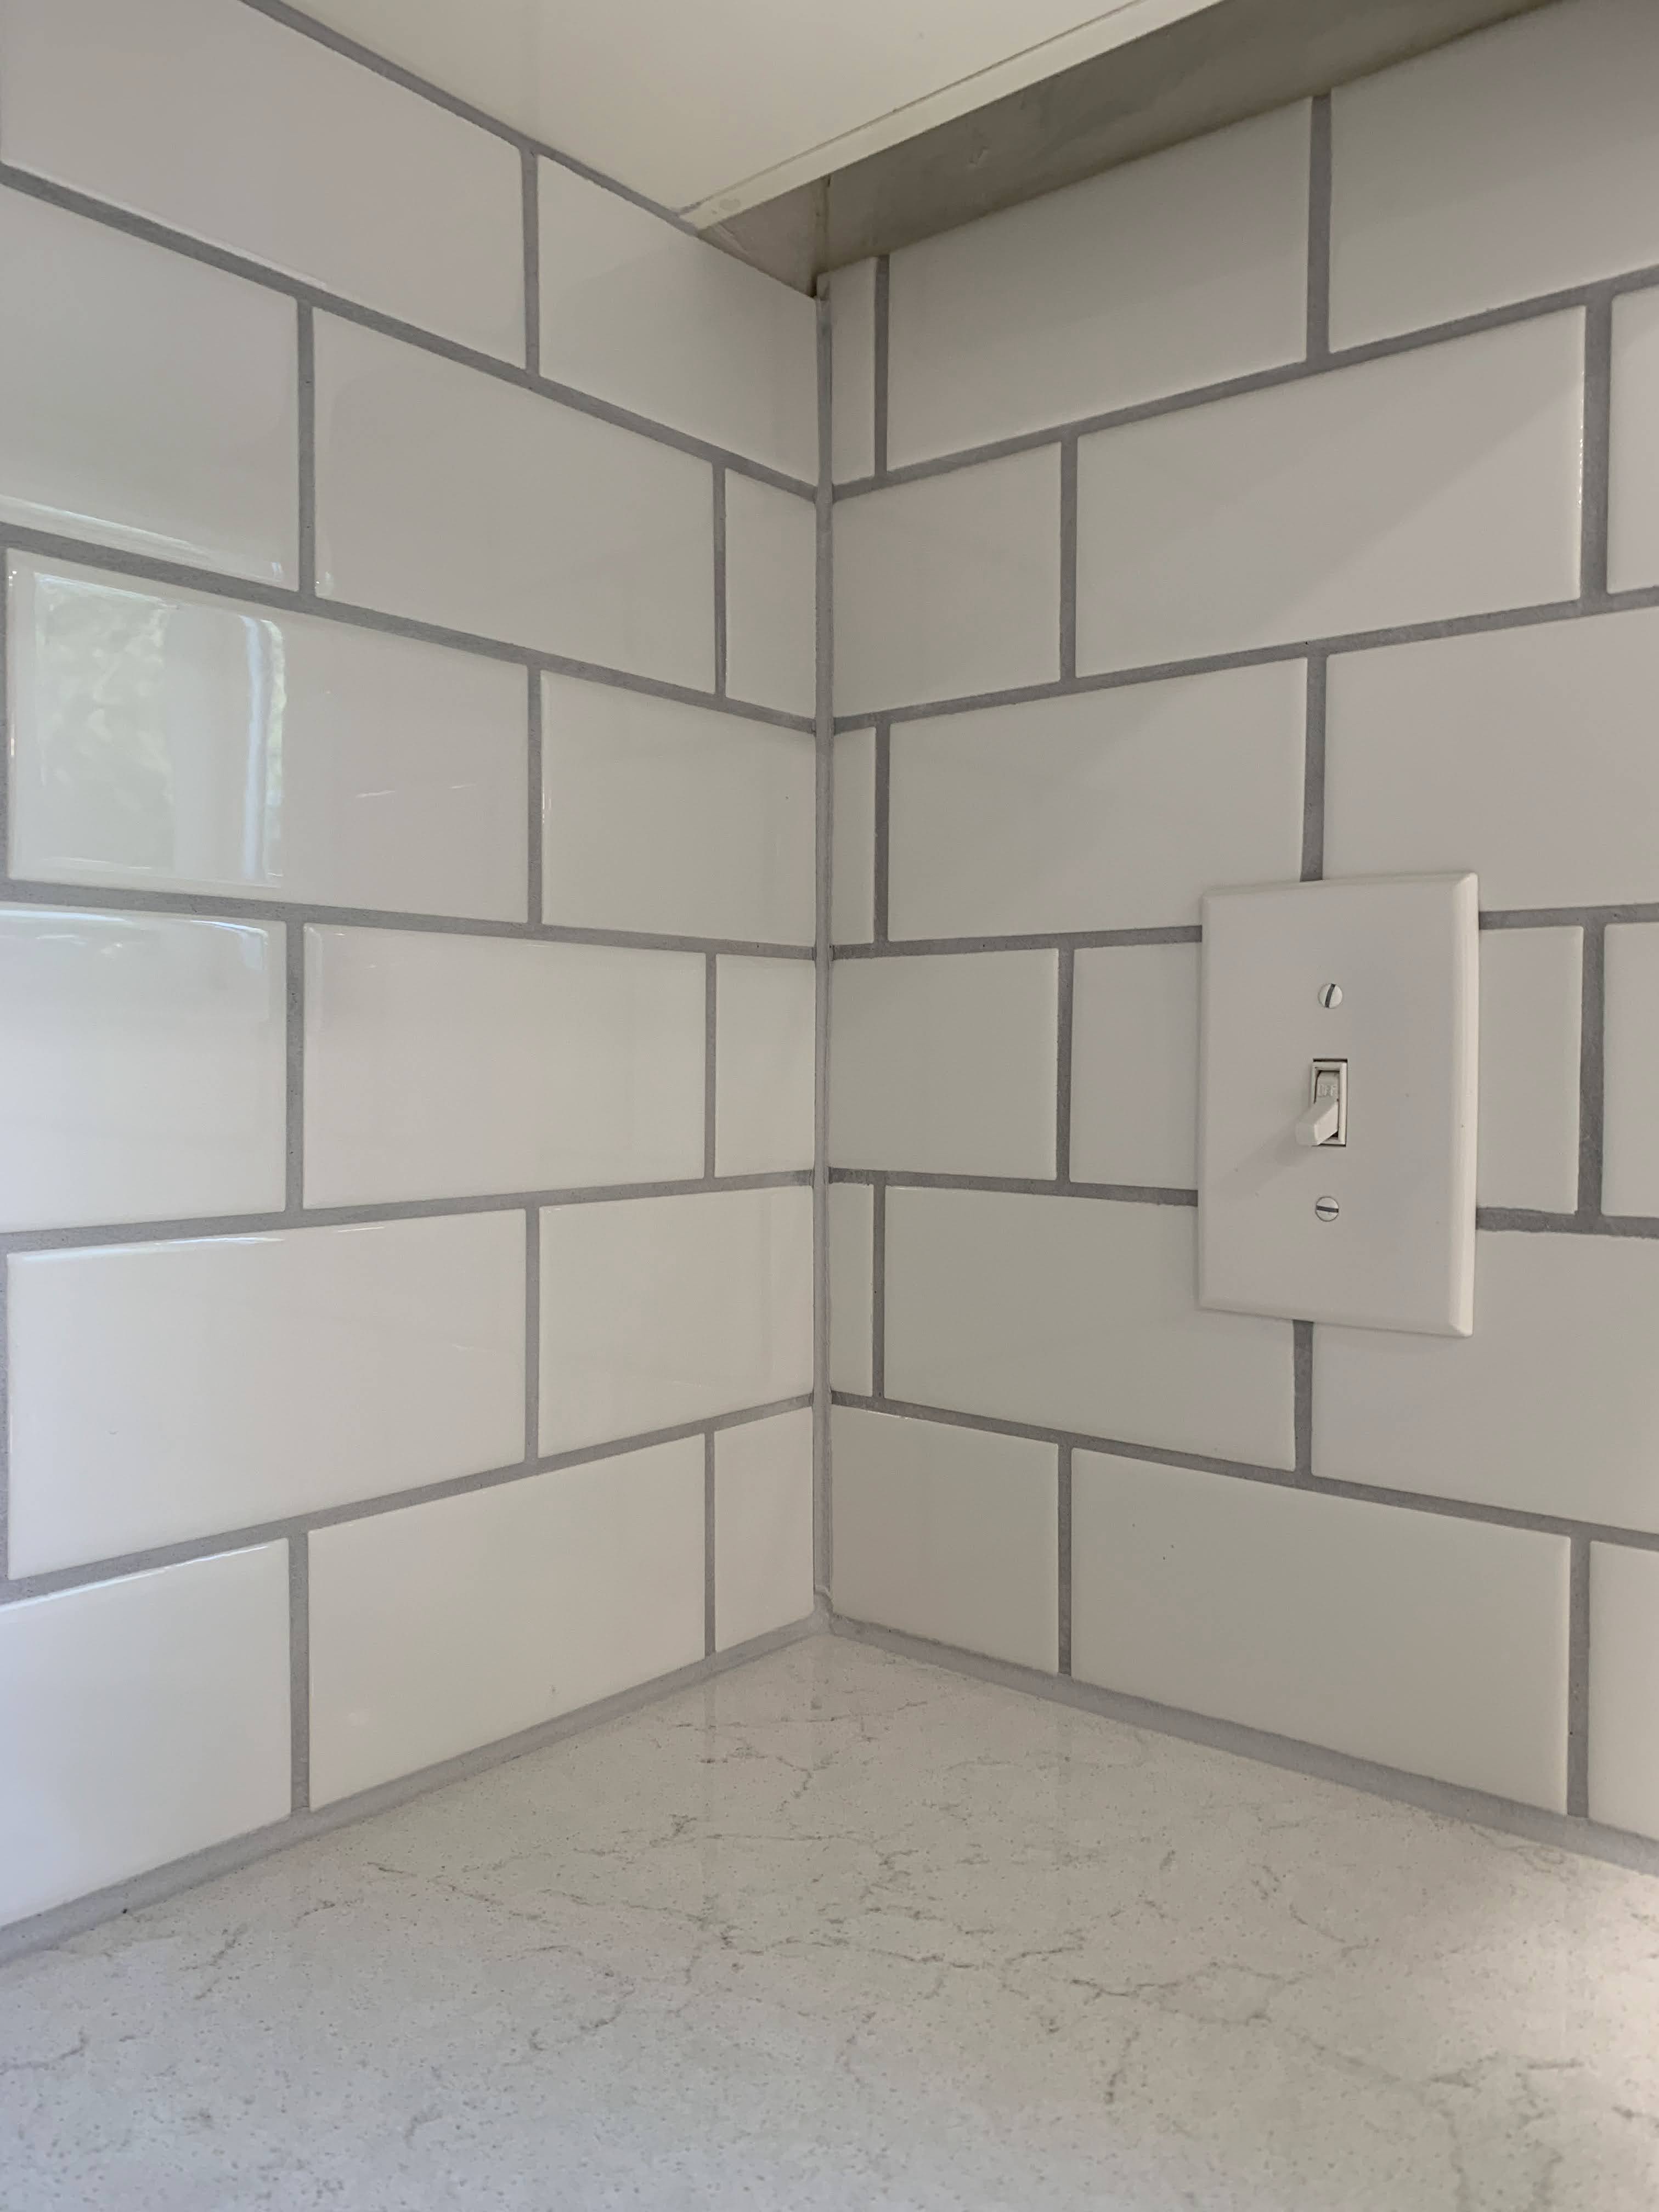
The Result
This subway tile backsplash project took a full workweek. It takes time to install even a “simple” ceramic subway tile backsplash correctly.


If you want a well tailored fit, then even basic white subway tile backsplash won’t be cheap for the labor. But a perfect installation will definitely pay for itself over a literal lifetime of use.